
🎫 PixelLab Event Ticket Design: Complete Beginner’s Guide
Creating attractive event tickets is easier than ever with PixelLab. Whether you’re designing tickets for a birthday party, wedding, concert, conference, sports event, or VIP gathering, PixelLab provides the tools needed to produce professional-quality designs directly from your Android device. PixelLab Event Ticket Design: Complete Beginner’s Guide
Unlike expensive desktop software, PixelLab allows you to combine custom typography, shapes, gradients, logos, QR codes, and images into an eye-catching ticket that looks ready for print or digital sharing. The app is lightweight, beginner-friendly, and offers enough creative flexibility for both personal and professional projects.
In this comprehensive guide, you’ll learn the complete process of designing event tickets in PixelLab—from setting up the canvas to exporting a high-resolution final design.
Table of Contents
🎨 Why Use PixelLab for Event Ticket Design?
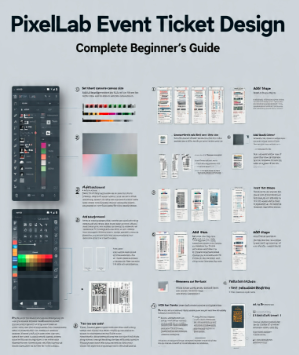
Many people assume they need Photoshop or Illustrator to create professional tickets. In reality, PixelLab offers many features that make ticket creation simple while still producing impressive results.
✅ User-Friendly Interface
PixelLab has a clean workspace that lets beginners create attractive designs without a steep learning curve. Essential tools are easy to find, making the design process faster and more enjoyable.
✅ Advanced Text Editing
Event tickets rely heavily on typography. PixelLab lets you:
- Use custom fonts
- Apply shadows and strokes
- Add gradients
- Control spacing and alignment
- Create stylish text effects
This makes it easy to highlight event names, dates, and important information.
✅ Layers for Better Design Control
Every design element remains editable. You can move, resize, duplicate, or delete individual objects without affecting the rest of the ticket.
✅ High-Quality Export
PixelLab allows you to export tickets in high resolution, making them suitable for:
- Printing
- Social media promotions
- Email invitations
- Digital ticket distribution
🛠️ What You’ll Need Before You Start
Prepare these items before opening PixelLab:
- PixelLab installed on your Android device
- Event logo (if available)
- High-quality background image or texture
- Event information
- Custom fonts (optional)
- QR code (if required)
- Sponsor logos (optional)
Having these assets ready helps you complete the design more efficiently.
📱 Step 1: Create a New Canvas
Open PixelLab and create a blank project.
Choose a canvas size that matches your intended output. For printable tickets, a landscape layout often works well. Keep enough space for text, branding, and any scannable QR code while maintaining balanced margins.
A consistent layout makes the ticket look more professional and easier to read.
🎨 Step 2: Design the Ticket Background
The background sets the overall mood of your event.
For example:
- Gold and black for VIP events
- Neon colors for concerts
- Floral themes for weddings
- Bright colors for birthday parties
- Corporate colors for conferences
✍️ Step 3: Add the Event Name
Your event name should be the most prominent element on the ticket.
Choose a bold font, increase its size, and ensure it contrasts well with the background. Keep the wording concise and centered or aligned with the overall design style.
📅 Step 4: Add Event Details
Include all essential information, such as:
- Event date
- Starting time
- Venue
- Organizer
- Ticket number
- Entry gate
- Seat number (if applicable)
- Contact information
Arrange these details neatly with consistent spacing so attendees can quickly find the information they need.
🎨 Step 5: Enhance the Design
To make your ticket look polished:
- Add subtle shadows behind text.
- Use shapes or borders to separate sections.
- Insert icons for date, location, or contact details.
- Apply gradients sparingly for a modern appearance.
- Include your event logo for branding.
Consistency in colors and typography helps create a professional look.
📷 Step 6: Add QR Codes or Barcodes
If your event uses digital check-in, place a QR code or barcode in a clear area of the ticket.
Ensure there is enough white space around the code so scanners can read it easily. Test the exported image with a QR scanner before printing or sharing.
💾 Step 7: Export the Ticket
When your design is complete:
- Review all text for spelling and dates.
- Zoom in to check alignment.
- Export at the highest quality available.
- Save a copy of the editable project so you can make changes later.
A high-resolution export ensures the ticket looks sharp on both screens and paper.
💡 Professional Design Tips
- Maintain a consistent color palette.
- Leave adequate whitespace around important elements.
- Keep logos in high resolution.
- Make the event name the focal point.
- Test-print one sample before producing multiple copies.
❌ Common Mistakes to Avoid
- Overcrowding the ticket with text.
- Using low-quality images.
- Choosing fonts that are difficult to read.
- Placing text too close to the edges.
- Forgetting to proofread dates and venue details.
- Exporting at low resolution.
Avoiding these mistakes results in a cleaner and more professional design.
🎯 Final Thoughts
PixelLab is an excellent tool for creating professional event tickets without requiring advanced design software. By combining thoughtful layouts, readable typography, consistent branding, and high-quality exports, you can design tickets suitable for parties, weddings, concerts, conferences, and corporate events directly from your smartphone.
The key to a professional result is not using more effects—it’s creating a clean, organized design that communicates all essential information clearly while reflecting the style of the event.
❓FAQs
Can I create printable event tickets in PixelLab?
Yes. Export your design in high resolution to ensure it prints clearly.
Is PixelLab suitable for professional ticket design?
Yes. With proper typography, spacing, and branding, PixelLab can produce professional-quality event tickets.
Can I add a QR code to my ticket?
Absolutely. Import a QR code image and position it where it remains easy to scan.
What type of events can I design tickets for?
You can create tickets for concerts, weddings, birthdays, conferences, sports events, school functions, fundraisers, and VIP gatherings.
Which image format should I export?
PNG is generally the best choice because it preserves image quality and supports transparent backgrounds if needed.